There is no substitute for a truly dark sky. You can buy the biggest telescope in the world, but from a city backyard, it will never show you the delicate spiral arms of the Pinwheel Galaxy. For that, you need to travel.
But traveling with astronomy gear is stressful. You're driving hours into the middle of nowhere, often without cell service. If you forget a counterweight, a power cable, or your red flashlight, your trip is over before it begins. I've been there, and I've learned the hard way.
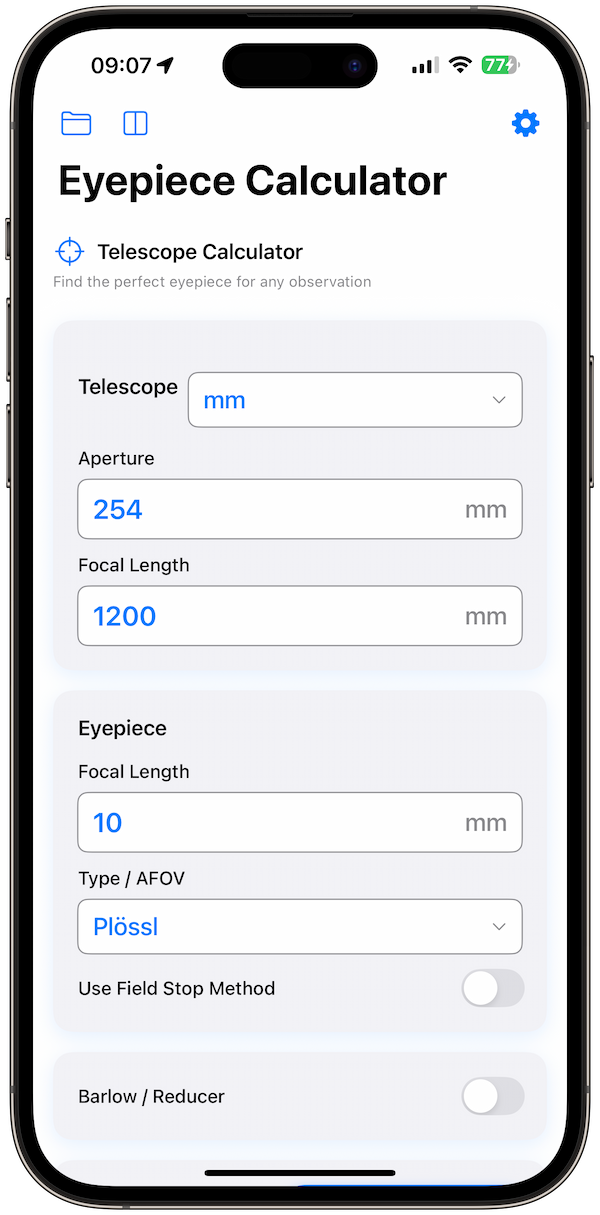
This guide isn't just a list of stuff to buy. It's a strategic workflow for planning, packing, and executing the perfect dark-sky expedition. We'll cover everything from gear logistics to using Telescope Eyepiece Calculator to build a target list that matches your specific site.
Phase 1: The Gear Checklist
I separate my gear into three "Criticality Tiers."
Tier 1: "Show Stoppers" (Trip-Ending Items)
If you forget these, you cannot observe. Period.
-
✓Optical Tube Assembly (OTA) + Dust caps
-
✓Mount Head + Counterweights (Most forgotten item!)
-
✓Tripod / Pier legs
-
✓Power Tank (fully charged) + Specific cables
-
✓Eyepiece Case (Don't leave the whole case at home!)
Tier 2: "Night Ruiners" (Comfort & Quality)
-
✓Dew Heaters + Controller (Essential in humid climates)
-
✓Red Headlamp (Spare batteries)
-
✓Warm Clothing (Dress for 20°F colder than the forecast)
-
✓Chair (Observing standing up is exhausting)
Phase 2: Creating a Strategic Target List
You have six hours of darkness. Do not waste two of them staring at a star chart app wondering "What should I look at?"
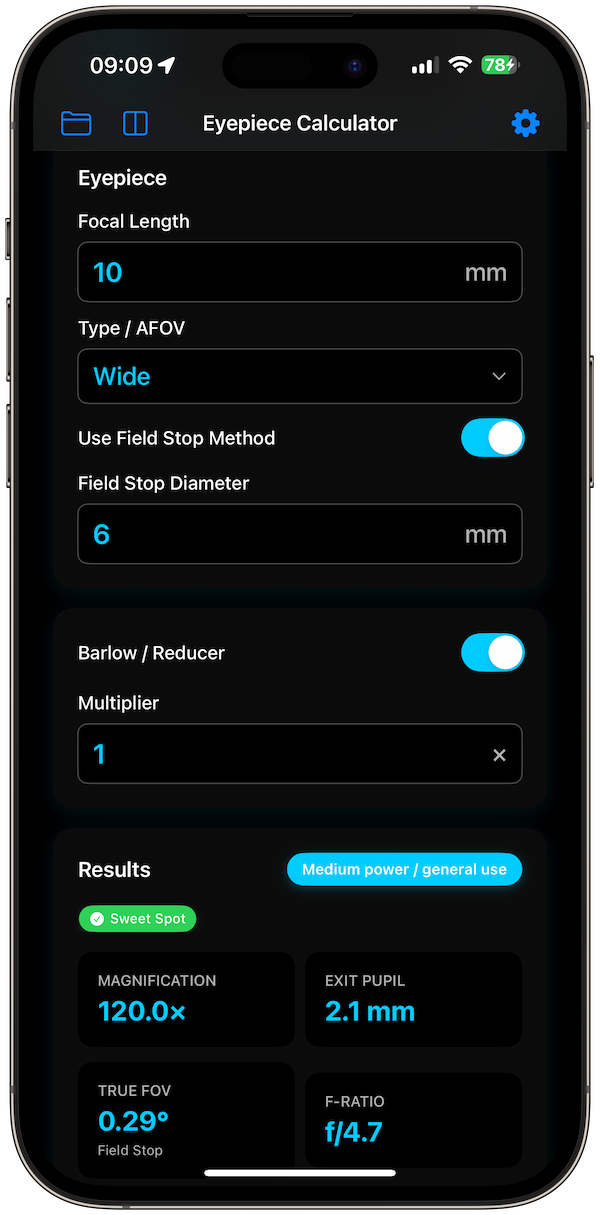
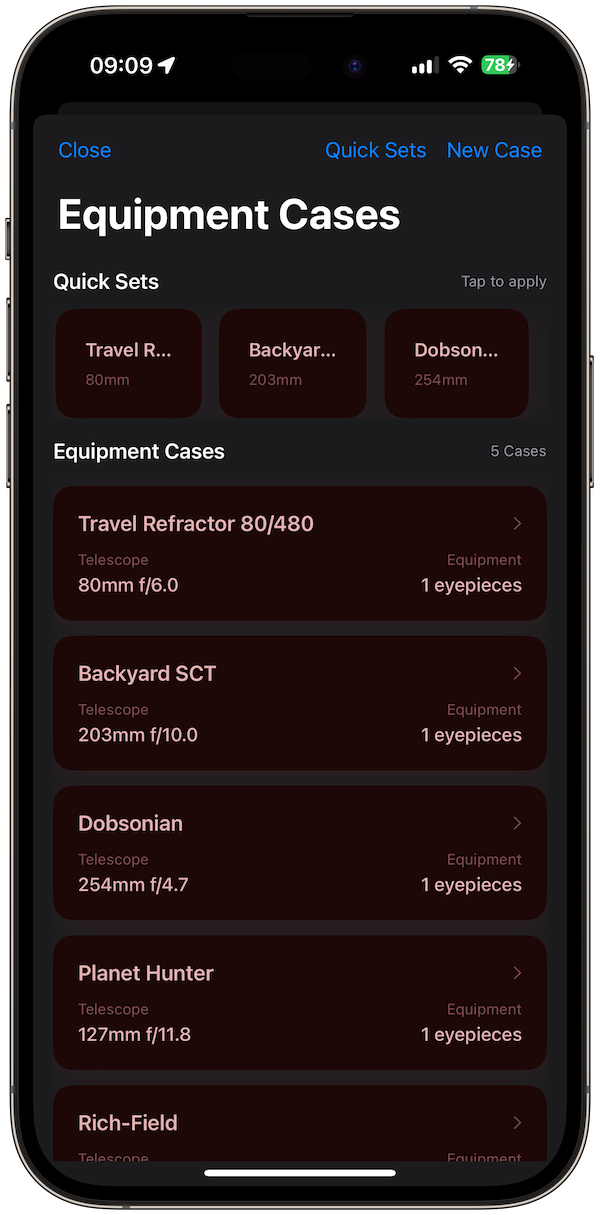
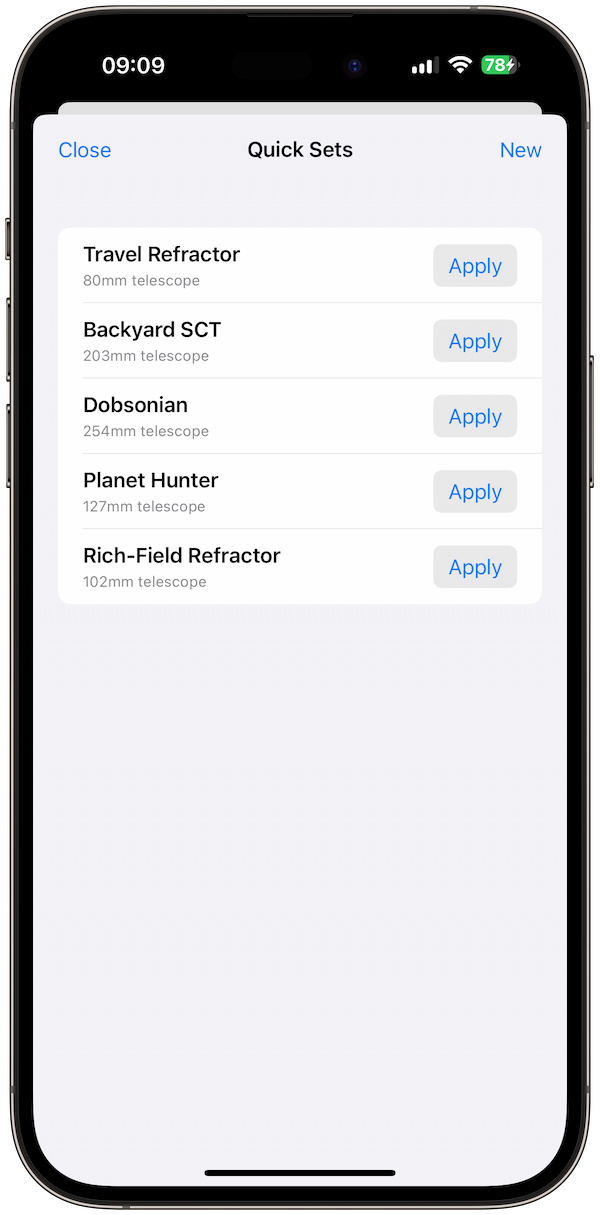
I build my target list before I leave the house, using the Telescope Eyepiece Calculator app. I create a specific "Case" in the app called "Dark Sky Trip" where I pre-calculate the best eyepiece for each object.
/2 equipment cases section dark mode.png)
The "Mix Tape" Approach
Just like a good playlist, your observing list needs variety. I try to hit one of each:
- The Showpiece: (e.g., M42, M13) – Start with a bang to build confidence.
- The Challenge: (e.g., Horsehead Nebula) – Something that needs dark skies.
- The Ghost: (e.g., M101) – Low surface brightness galaxies that are invisible in the city.
- The Structure: (e.g., Veil Nebula) – Using an OIII filter to trace filaments.
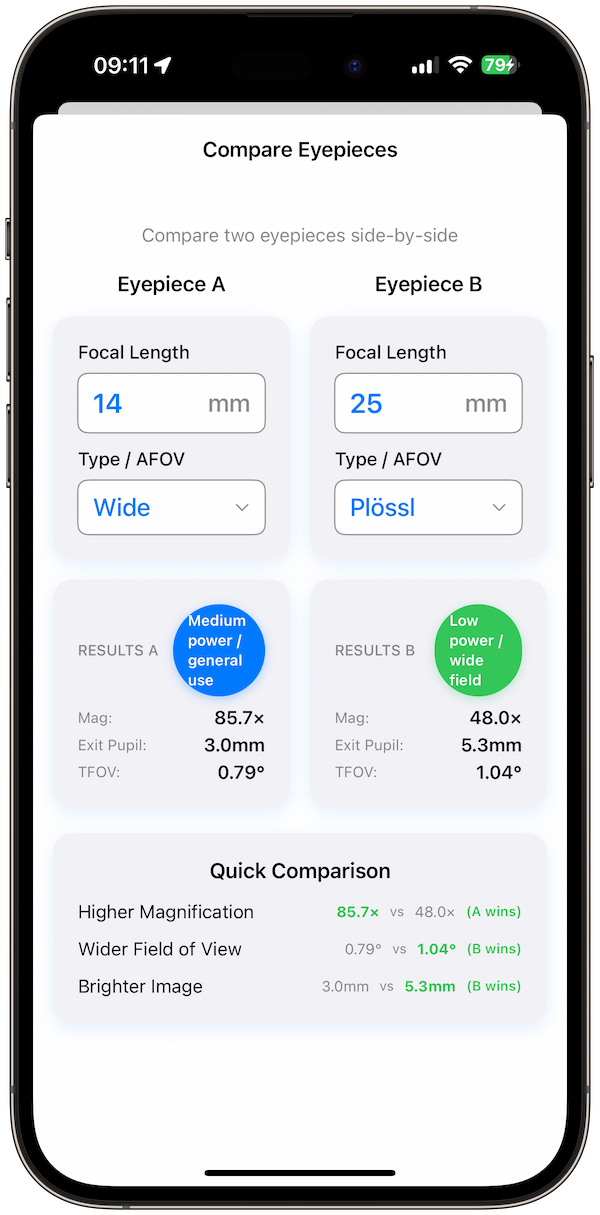
Phase 3: Matching Targets to Eyepieces
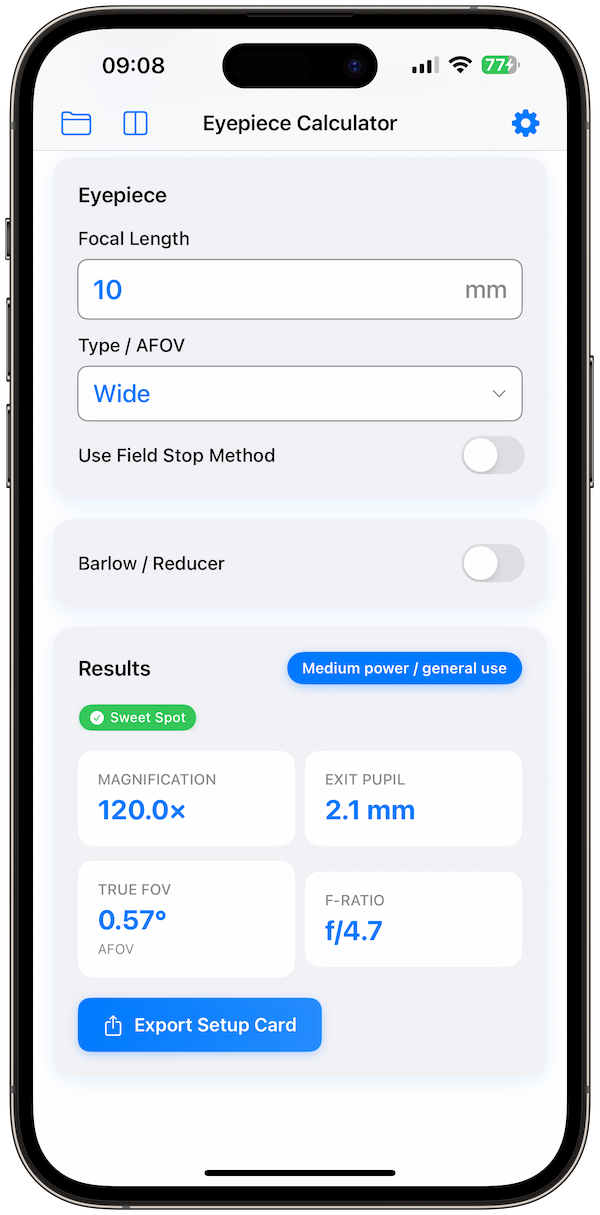
This is where planning pays off. In the city, M31 (Andromeda) is just a bright core. Under dark skies, it extends to 3 full degrees. If you bring your standard 25mm Plossl (which gives ~1.0° TFOV), you will be looking at the core and missing the dust lanes.
Use the app's Visual Simulator to check your TFOV against the targets.
Pro Tip: The Exit Pupil Trap
Under dark skies, your pupils dilate fully (up to 7mm). This means you can use lower power eyepieces than you can in the city. In the city, a 5mm Exit Pupil looks washed out (gray sky). In the desert, a 5mm Exit Pupil shows a pitch-black background and contrasting stars.
Takeaway: Pack your longest focal length eyepiece (30mm, 40mm). This is its time to shine.
Phase 4: On-Site Logistics and Logging
You've arrived. The sun is setting. Setup time.
- Level the Tripod: Do this first.
- Balance the Scope: Critical for tracking accuracy.
- Align Finderscope: Do this while it's still twilight on a distant mountain or telephone pole. It's impossible to do in the dark.
- Wait for Cool Down: Mirrors need to reach ambient temperature. Give it 45-60 minutes.
As you observe, log everything. I use the Log Observation button in the app to capture the time, location (GPS auto-filled), and the exact eyepiece used. Why? Because a year from now, you'll wonder: "Did I use the OIII filter on the Veil, or was it the UHC?"
Phase 5: The Post-Trip Review
The next morning, while having coffee, open your logs on your iPad (synced via iCloud). Review what worked.
- "The 9mm was too much power for the seeing conditions."
- "I need a dew heater for the secondary mirror."
- "The Veil Nebula was spectacular at 2.5° TFOV."
Conclusion
A dark sky trip is a pilgrimage. Use Telescope Eyepiece Calculator to handle the math and the planning so you can focus on the awe. Clear skies!
Plan Your Trip Professionally
Build target lists, simulate views, and check TFOV ranges instantly.
Download Checklist Tool